Mastering the art of smoke throws is a crucial skill for success in Counter-Strike 2, especially on iconic maps like Dust 2. Understanding the most effective CS2 Smoke Spots on Dust 2 can give your team a strategic edge, whether you’re defending key areas or executing site takeovers. From gaining control of A Long to setting up advantageous positions for B site, knowing where to place your smokes can shift the tide of any match. In this guide, we’ll explore essential smoke spots and techniques that can elevate your gameplay and help you dominate Dust 2.
The Importance of Smoke Spots in Dust 2
Understanding the significance of CS2 Smoke Spots on Dust 2 is essential for players aiming to gain a tactical advantage. Smoke grenades are critical tools in Counter-Strike 2, offering opportunities to block enemy vision, isolate key areas, and create strategic plays. On Dust 2, a map known for its open spaces and chokepoints, well-thrown smokes can dictate matches.
Here’s why smoke spots are vital:
- Blocking Vision: Smokes obscure long lines of sight, such as A Long or Mid, preventing snipers from dominating.
- Site Control: Smokes aid in taking or defending bomb sites by creating temporary barriers.
- Rotations and Timing: A timely smoke can delay enemy pushes or buy time for repositioning.
- Map Control: Smokes at strategic positions like Xbox or CT spawn help secure key areas.
By mastering CS2 Smoke Spots on Dust 2, you improve both offensive and defensive strategies. Practice is crucial for throwing accurate smokes under pressure, ensuring your team maintains the upper hand.
Best Smoke Spots for A Long Control
Controlling A Long is a crucial aspect of gameplay on Dust 2, and utilizing CS2 Smoke Spots on Dust 2 effectively can turn the tide in your favor. Properly placed smokes can deny visibility, block defensives, and create opportunities for pushing through or holding this area.
Here are some key smoke spots for A Long control:
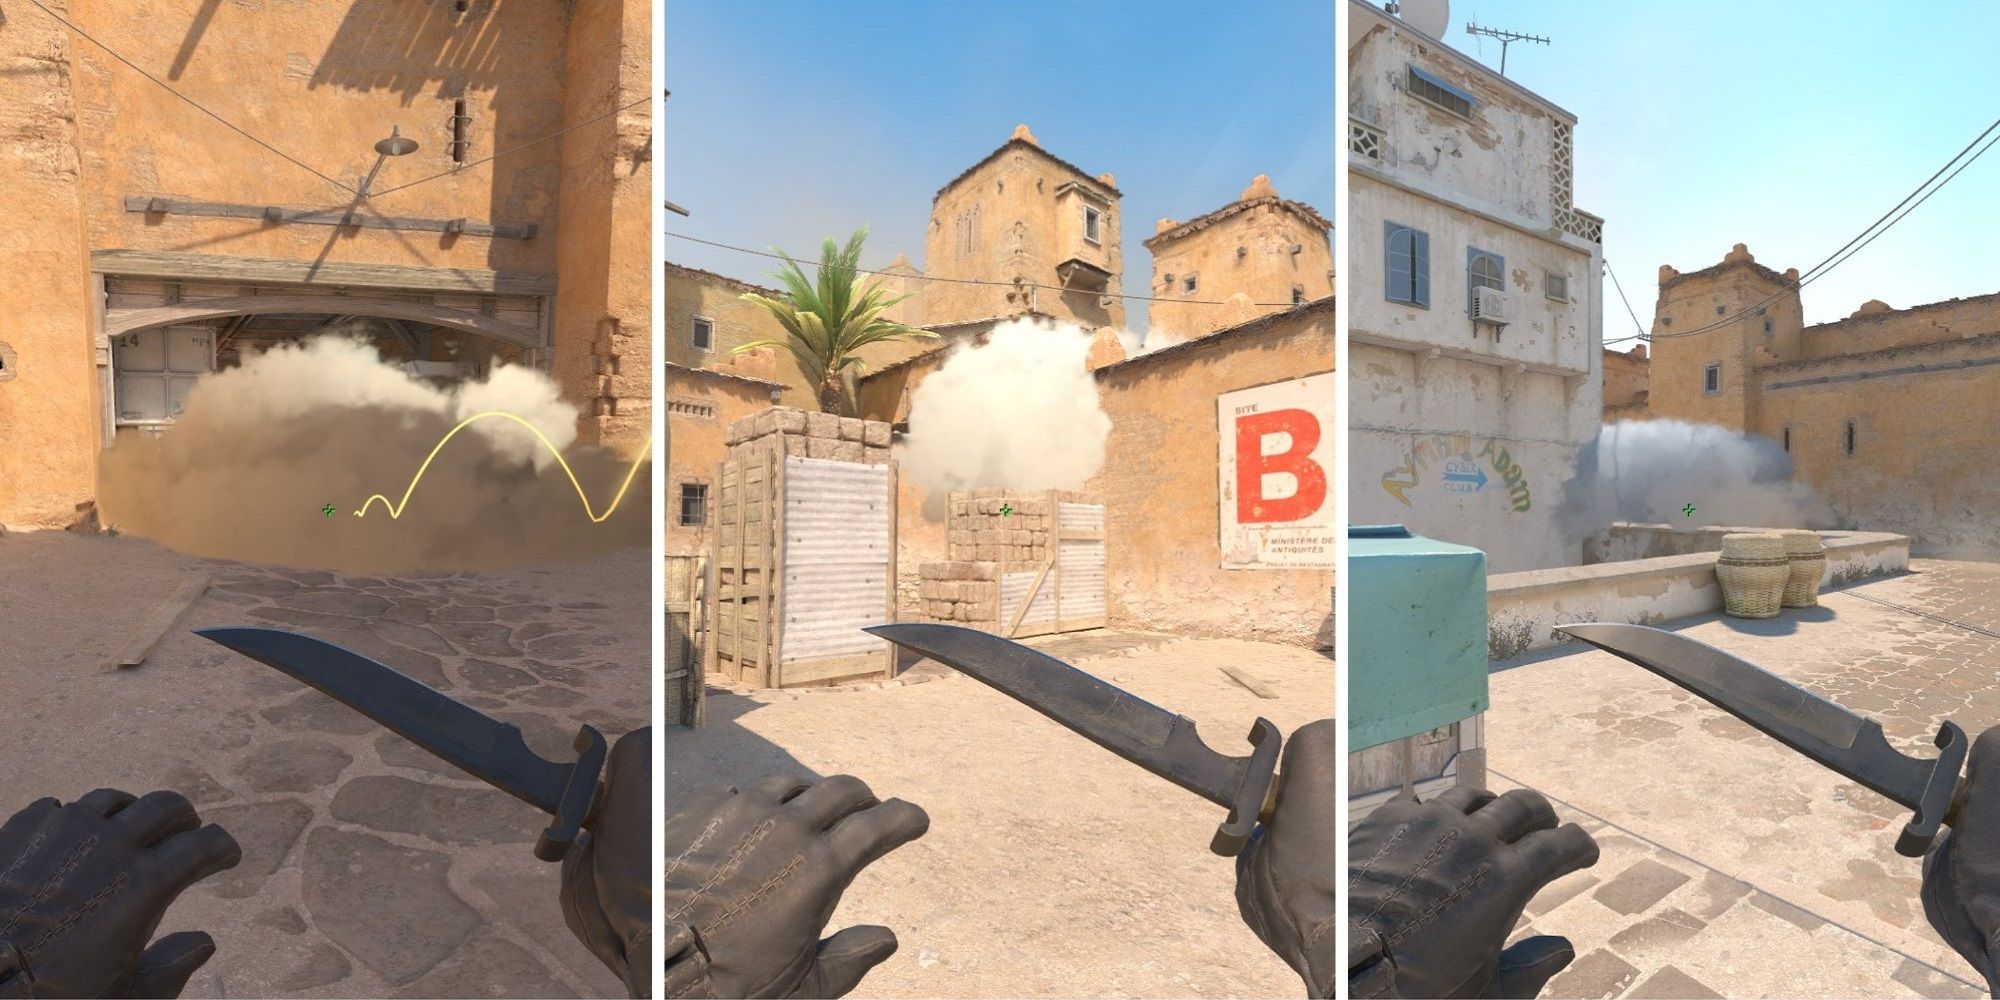
- Cross Smoke (Long Corner): A smoke thrown towards the cross from T spawn or around blue container ensures that CT players holding long cannot pick off streaking Ts on the cross. It provides excellent cover to take control safely.
- Car Smoke: Smoking off the car prevents defenders from peeking aggressively or holding an off-angle. This enables your team to focus on other threats without exposing themselves.
- Pit Smoke: If an enemy is known to be in the pit, a smoke can neutralize this advantage. It either forces them to relocate or restricts their ability to engage.
Mastering smokes for A Long ensures smoother execution during attacks and improves overall map control. Practice these CS2 Smoke Spots on Dust 2 to dominate A Long!
Effective CT Spawn Smoke Setups
Strategically using smokes at CT spawn can significantly influence your team’s success on Dust 2. These setups allow for safer rotations, disrupt enemy timing, and provide excellent opportunities to defend or secure bomb sites efficiently.
Here are a few effective CT spawn smoke techniques for CS2 Smoke Spots on Dust 2:
- Mid-to-CT Smoke: This throw helps block visibility for opponents holding mid control. Ideal for safe rotations from B to A or vice versa. Stand near the Xbox on mid, aim slightly above the CT spawn line, and execute the smoke.
- CT-to-A Ramp Smoke: Perfect for blocking off vision when enemies are rushing long or preparing for an A-site push. Line up at the default CT spawn location, aim at the A plat region, and cover potential aggressive plays.
- CT-to-B Tunnel Smoke: Use this to obstruct attackers aiming to control B-site. From CT spawn, aim into the B-tunnel entry to deny visibility and delay their advances.
Mastering these smokes ensures your team has a tactical edge when defending or retaking sites. Coordinated timing and communication make a huge difference when utilizing CS2 Smoke Spots on Dust 2.
How to Smoke Xbox for Mid Control
Mastering the Xbox smoke is essential for establishing mid control, one of the most crucial tactics on Dust 2. This particular smoke helps obscure the enemy’s sightlines from CT spawn, granting your team a safer passage toward short, catwalk, or mid.
Steps for the Xbox Smoke in CS2:
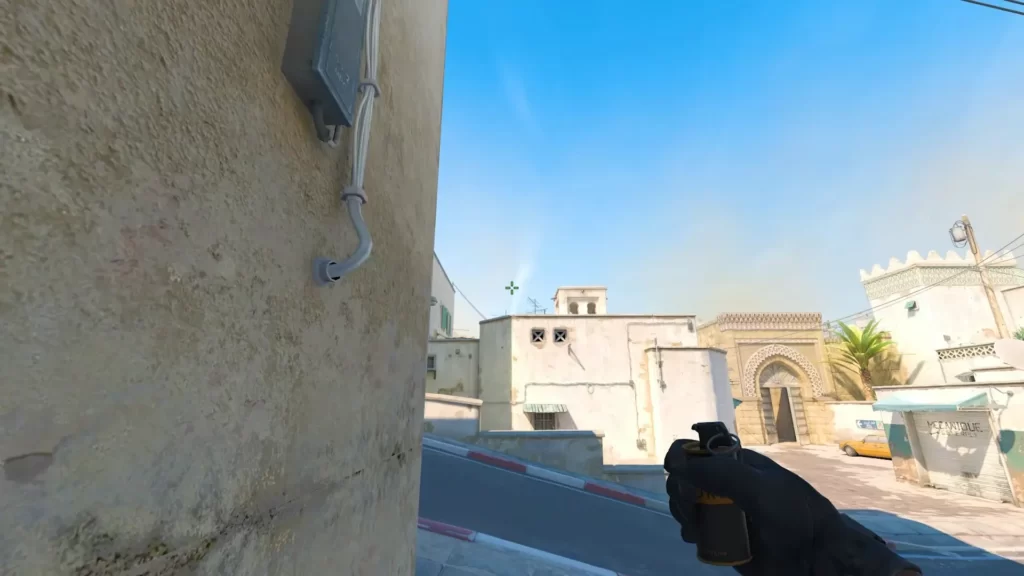
- Position Yourself: Stand at the T-spawn behind the double barrels.
- Line Up: Aim at the foot of the wire where it meets the pole in the sky.
- Release the Smoke: Perform a standard throw while holding the grenade’s right click.
Using this smoke effectively can dramatically improve your team’s map presence. It limits the defenders’ visibility, creating opportunities to pressure mid and set up plays for A short or B site. Additionally, this Xbox smoke prevents CTs from easy mid pushes, offering your team early-round control.
Committing time to perfect this essential throw ensures greater success with your CS2 Smoke Spots on Dust 2 strategies. Reliable execution can often make the difference in your game plan!
Useful Smokes for B Site Entry
B site on Dust 2 is a notoriously challenging position to take, but with the right CS2 Smoke Spots on Dust 2, attackers can significantly tilt the odds in their favor. Strategic smokes can block off essential defender sightlines while granting attackers better map control.
Here are key smokes to execute for a successful B site entry:
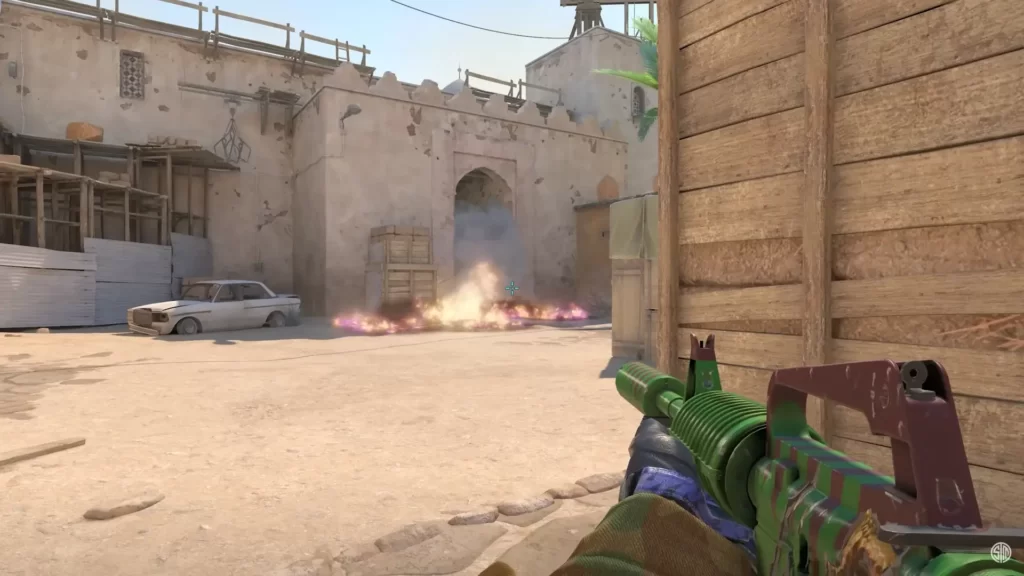
- Double Doors Smoke: Block the vision of defenders peeking from mid doors. This smoke allows teammates to cross into B safely without exposing themselves.
- Back Platform Smoke: Neutralize defenders playing behind the platform. This makes it easier to push into the site without being fired upon.
- Window Smoke: Essential for reducing enemy pressure from the B site window, commonly a sniper’s vantage point.
Using these smokes in coordination helps create chaos for defenders while providing attackers with cover. For maximum effectiveness, ensure teammates synchronize their smokes and time their push accordingly. Master these CS2 Smoke Spots on Dust 2, and you’ll secure B site more efficiently in your matches!
One-way smoke techniques in Dust 2
One-way smokes are an essential strategy when mastering CS2 Smoke Spots on Dust 2. They allow you to gain a tactical advantage by obstructing the enemy’s vision while maintaining optimal visibility for yourself. Here are some effective one-way smoke strategies on Dust 2:
- A Long Corner Smoke: Throw a precise smoke at the corner of A Long. By crouching near the edge, you can spot enemies approaching while remaining mostly hidden. This is perfect for defending the area without exposing yourself.
- B Site One-Way: At B site, drop your smoke close to the platform box in the back corner. You can stand slightly above it to get a clear view of Tunnels while attackers won’t detect your silhouette easily.
- Mid Doors Smoke: Toss a smoke on the ledge by mid doors. Standing behind it provides great visibility to lower tunnels and mid doors while enemies struggle to see you clearly.
Mastering one-way smoke positions not only confuses opponents but also creates opportunities for sneaky plays. With practice, these CS2 Smoke Spots on Dust 2 can significantly improve your overall performance.
Tips for Practicing Your Smoke Throws
Mastering CS2 Smoke Spots on Dust 2 requires consistent practice. Smoke grenades can turn the tide of a game, but only when executed accurately. Here are some practical tips to improve your smoke throwing skills:
- Learn Lineups: Use in-game markers like textures, signs, or buildings to perfect your throw angles. Consistency comes from memorizing your lineups.
- Use the Practice Mode: Enable infinite grenades and noclip in practice mode to experiment with different angles and positions without restrictions.
- Record Demos: Watch your own gameplay to identify areas where your smoke throws can be optimized.
- Focus on Key Spots: Prioritize crucial CS2 Smoke Spots on Dust 2, such as Xbox, CT Spawn, and A Long.
- Adjust for Movement: Practice throwing smokes while standing still and while in motion to handle in-game dynamics effectively.
With regular practice, you’ll improve precision, ensuring that your smokes land in critical game-changing spots. Remember, a well-placed smoke is a strategic asset every player should master.
Frequently Asked Questions
What are smoke spots in CS2 Dust 2?
Smoke spots in Dust 2 refer to strategic areas on the map where players throw smoke grenades to block enemy vision or control different map sections. These spots are critical for executing strategies, retaking bomb sites, or defending routes. Effective use of smoke can provide a tactical advantage by allowing safe passage, isolating enemies, or creating confusion during gameplay.
Why are smoke grenades important on Dust 2?
Smoke grenades are essential on Dust 2 because they allow players to block key sightlines, disrupt enemy plans, and control the flow of the game. Given Dust 2’s open design and long sightlines, controlling visibility is vital for both attackers and defenders. Smokes can help secure bomb plants, retake bomb sites, or delay enemy pushes effectively, making them a key utility for any player.
What are the most popular smoke spots on Dust 2?
Some of the most common smoke spots on Dust 2 include the ‘Xbox’ smoke, which allows players to cross mid without being seen by snipers on A long, and the ‘CT spawn’ smoke to help attackers cover their path when pushing from mid to B site. Other popular spots include A long corner smokes and smokes for blocking A site ramps during an execute. Mastering these is essential for efficient gameplay.
How do I practice smoke spots on Dust 2?
To practice smoke spots on Dust 2, you can use the in-game practice mode or create a private server with cheats enabled (use “sv_cheats 1”). Enable grenade trajectories using the command “sv_grenade_trajectory 1” to see your throws and adjust accordingly. Spend time learning the lineup for each smoke spot and understanding how it fits into your team’s strategy. Repetition is key to becoming consistent with smoke placement.
If you are checking current asks before you trade, compare live CS2 skin prices on CSOffer me, then buy on Skin.Trade or sell from your inventory.