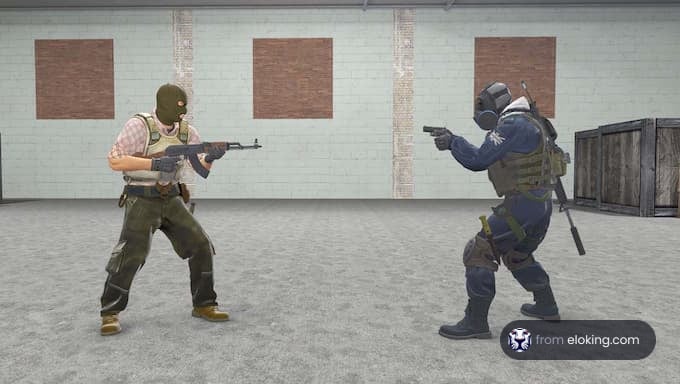
Navigating the competitive world of Counter-Strike 2 can be challenging, but mastering the art of a 1v1 in CS2 is a great way to sharpen your skills and improve your gameplay. Whether you’re testing your abilities against friends or preparing to dominate opponents, learning how to set up and excel in 1v1 matches is essential. In this guide, we’ll provide step-by-step instructions to help you set up private servers, use workshop maps, and practice effectively, all tailored to enhance your performance. Dive in to take your CS2 skills to the next level!
How to 1v1 in CS2: The Essential Steps
Engaging in a 1v1 in CS2 is one of the best ways to improve your skills and test your reflexes in a controlled environment. These matches eliminate the chaos of teamplay, allowing you to focus on strategy, accuracy, and timing. Here’s how you can set yourself up for success:
- Choose Your Opponent: Find a friend, teammate, or community member who matches—or slightly exceeds—your skill level. This ensures a fair yet challenging match.
- Determine the Game Settings: Decide on the map, match rules (e.g., first to 16 points), and weapon preferences beforehand for a smooth experience.
- Set Up a Private Server: Use CS2’s private server feature for uninterrupted gameplay. Ensure both players can connect without issues.
- Prepare Essentials: Warm up with aim training, confirm your FPS settings, and double-check your equipment to avoid technical hiccups during your match.
Mastering the basics of 1v1 in CS2 paves the way for more competitive duels, boosting in-game confidence and fostering improvement in crucial areas. Dive in and focus on consistent progress to sharpen your skills!
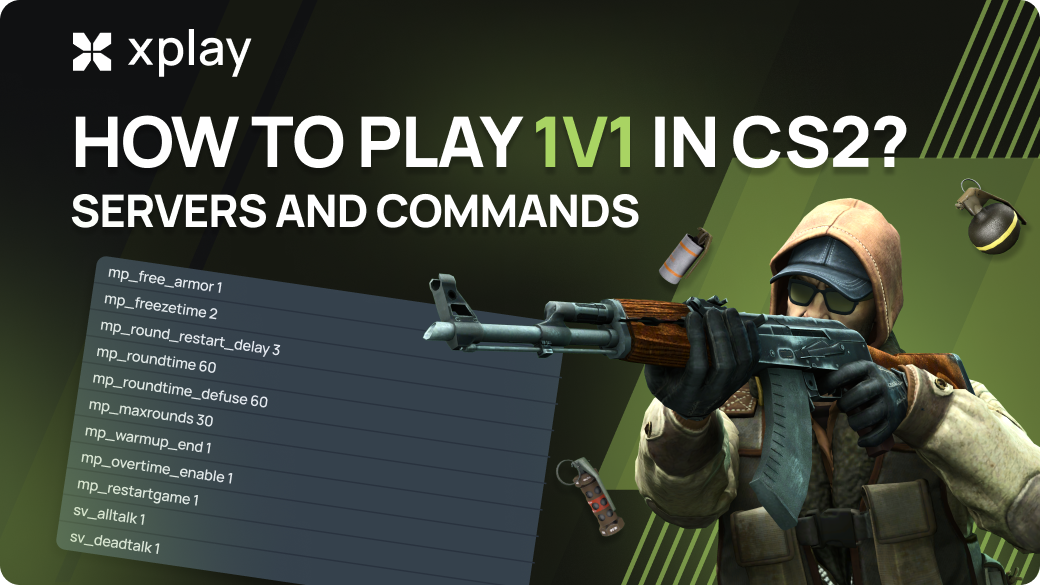
Setting Up a 1v1 Private Server in CS2
To master the art of a 1v1 in CS2, you’ll want to set up a private server for uninterrupted practice and competition. Creating such a space allows you to control the game environment and focus on honing your skills. Follow these simple steps to set up your server:
- Launch CS2 and Access the Console: First, enable the developer console from the game settings. Press to open the console once enabled.
~ - Create a Private Lobby: Navigate to the “Play CS2” menu, select “Practice with Bots,” and ensure no bots are added to avoid interference.
- Load the Desired Map: Use the console command to load the map you prefer. Common choices for 1v1 include Aim_Map or Dust2 Mid-Only.
map [map_name] - Set Match Parameters: Configure settings like round time, starting money, and weapon limitations using console commands for a customized experience.
Setting up a private server ensures you practice 1v1 in CS2 the way you want, preparing for competitive real-world scenarios.
Utilizing Workshop Maps for Improved Gameplay
When preparing for a 1v1 in CS2, leveraging Workshop maps can significantly boost your gameplay. These custom maps are specifically designed to enhance aim, movement, and strategy in one-on-one scenarios. Here’s how you can utilize them effectively:
- Find the Right Map: Search for popular 1v1 in CS2 Workshop maps via the Steam Workshop. Look for maps that are well-reviewed and tailored for aim duels or close-quarters combat.
- Subscribe and Download: Once you’ve chosen a map, click the “Subscribe” button. The map will automatically download and be available in your CS2 library.
- Use Variety: Rotate between different maps to practice diverse scenarios like long-range fights, tight corners, or open spaces.
Why choose Workshop maps for your 1v1 matches? Unlike standard maps, these are optimized for quick encounters and fair starts, ensuring a better learning curve.
In conclusion, Workshop maps serve as a practical tool not only for improving your 1v1 skills but also for making the practice process enjoyable and efficient.
Essential Console Commands for 1v1 Matches
When preparing for a 1v1 in CS2, understanding and utilizing essential console commands can significantly enhance the experience. These commands allow for a customized match setup and ensure fairness during your duel.
Here’s a list of useful commands to set up your 1v1 in CS2:
- sv_cheats 1: Enables the use of commands for customization.
- mp_roundtime 60: Extends the round time to 60 minutes for uninterrupted play.
- mp_restartgame 1: Restarts the match after adjusting settings.
- mp_freezetime 0: Removes the freeze period at the start of each round.
- sv_infinite_ammo 1: Provides infinite ammo for convenient practice.
- mp_maxmoney 60000 / impulse 101: Sets the maximum money and gives instant funds for buying any weapon.
- bot_kick: Ensures no bots interfere with your match.
These commands help create an environment where skills are solely tested without external interruptions. To use them, simply open the developer console (activated via options) and type them in.
Incorporating these commands into your 1v1 in CS2 setup ensures a streamlined and enjoyable experience, letting you focus solely on outplaying your opponent.
Practicing and Improving 1v1 Skills
To excel in 1v1 in CS2, consistent practice and focused improvement are key. Winning relies not only on aim but also on game sense, positioning, and smart tactics. Here are some effective ways to enhance your skills:
- Routine Aim Practice: Use workshop maps or aim trainers to sharpen your precision. Dedicate time to scenarios like flick shots, tracking, and reaction time.
- Master Movement Mechanics: Perfect techniques like jiggle peeking, strafing, and counter-strafing to stay unpredictable and maintain accuracy.
- Analyze Your Gameplay: Record your 1v1 matches and review them to identify mistakes, inefficient movements, or missed opportunities. Reflection is crucial for progress.
- Focus on Crosshair Placement: Constantly improve crosshair alignment by keeping it at head level and pre-aiming likely enemy positions during duels.
- Set Goals: Concentrate on specific weaknesses, whether it’s improving headshots, timing utility, or understanding map control. Progress is easier when you target particular aspects.
With dedication and the right practice routines, you can significantly boost your performance in 1v1 in CS2, ultimately gaining an edge over your competition.
Joining Community Servers for 1v1 Matches
Joining community servers is a fantastic way to engage in 1v1 in CS2 matches without setting up your own server. These servers are crafted by the community and often come pre-configured with everything you need for thrilling one-on-one gameplay.
Here’s why community servers are a great choice:
- Easy Accessibility: No advanced setup is needed; you just have to find the right server.
- Pre-built Settings: Most servers already have optimized settings for 1v1.
- Diverse Players: Play against a variety of opponents, improving your skillset.
To join a community server for 1v1:
- Open CS2 and navigate to the “Community Server Browser.”
- Use the search or filter option to find “1v1” servers specifically.
- Review server details such as map type and player count before connecting.
Joining these servers not only enhances your 1v1 in CS2 experience but also cultivates good sportsmanship as you compete with players worldwide. Always follow server rules to enjoy a seamless gaming environment.
Summary
Mastering the art of 1v1 in CS2 requires a combination of preparation, practice, and persistence. Whether you’re looking to improve your skills or simply enjoy competitive gameplay, following the outlined steps will help you succeed. Here’s a quick recap:
- Set Up Your Private Server: Create a dedicated space for uninterrupted practice.
- Use Workshop Maps: These maps are tailored to make practice sessions more efficient and focused.
- Learn the Essential Console Commands: Simplify the match setup and customize your gameplay.
- Practice Regularly: Focus on aim, movement, and timing to enhance your performance consistently.
- Explore Community Servers: Connect with like-minded players and experience diverse playing styles.
Taking these steps will undoubtedly elevate your 1v1 in CS2 experience. Remember, improvement comes with time and dedication. Whether you’re a beginner or a seasoned player, these strategies allow you to refine your skills while enjoying the competitive thrill of 1v1 battles. Keep practicing and make every duel count!
Frequently Asked Questions
What is a 1v1 match in CS2?
A 1v1 match in CS2 (Counter-Strike 2) is a game mode where two players face off against each other in a controlled environment, testing their skills one-on-one. It is often used to practice aim, improve strategies, or settle disputes.
Why should I play 1v1 in CS2?
Playing 1v1s in CS2 helps improve your individual skills, such as aim, reaction time, map control, and strategic thinking. It’s also a great way to practice under pressure and enhance your decision-making in isolated scenarios.
How can I set up a 1v1 match in CS2?
To set up a 1v1 match in CS2, you need to create a private lobby, configure the game mode, and choose an appropriate map. You may also use custom commands in the console to adjust settings for a better experience. Detailed instructions are typically provided in the game or community forums.
What are the best maps for 1v1 in CS2?
The best maps for 1v1 in CS2 usually include small and confined areas like Aim_Map or specific official maps with dedicated zones for one-on-one combat. Custom maps designed for 1v1 gameplay are also great options.
If you are checking current asks before you trade, compare live CS2 skin prices on CSOffer me, then buy on Skin.Trade or sell from your inventory.