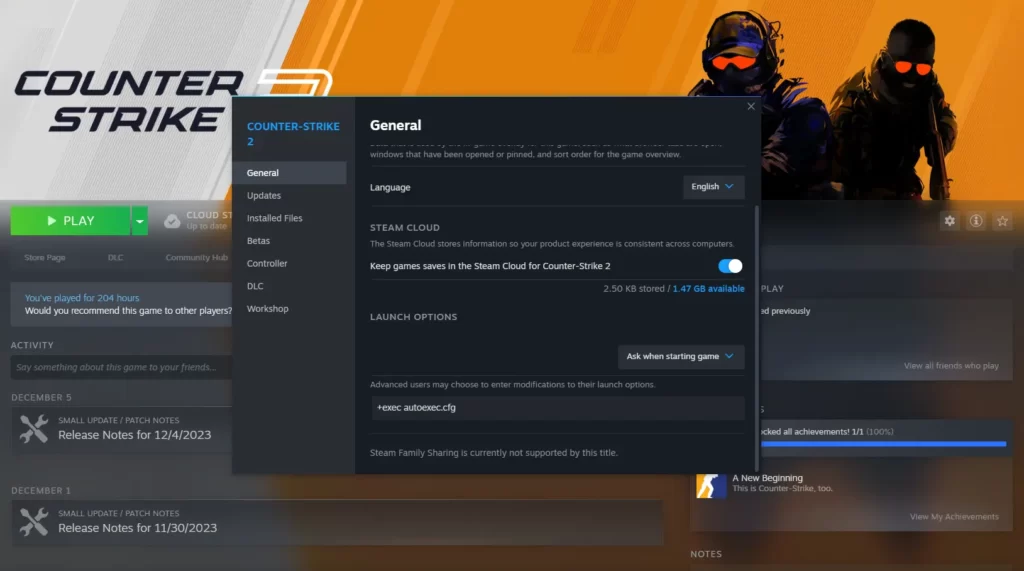
When it comes to enhancing your performance and personalization in gaming, the CS2 Autoexec file is an essential tool for players. Whether you want to fine-tune game settings, simplify gameplay with essential commands, or achieve smoother performance, knowing how to create and utilize an Autoexec file can make a significant difference. In this guide, we’ll walk you through everything from understanding its purpose to troubleshooting common issues, helping you optimize your gaming experience efficiently. By mastering your CS2 Autoexec file, you can take full control of your gameplay and customize it to suit your preferences perfectly.
Understanding the Purpose of an Autoexec File
A CS2 Autoexec file serves as a crucial tool for players seeking to customize and optimize their gameplay experience in Counter-Strike 2. This configuration file lets users store and apply a set of console commands automatically each time the game launches. Understanding its purpose can help you achieve consistency in settings, save time, and enhance performance.
Here’s why an Autoexec file is important in CS2:
- Consistency: It ensures your preferred settings, such as mouse sensitivity, crosshair style, and key bindings, do not reset after game updates.
- Optimization: You can apply performance-enhancing graphics and network settings tailored to your system.
- Convenience: Automating commands eliminates the need to manually enter them every time you play.
For instance, instead of retyping commands like cl_radar_scale or fps_max every session, the CS2 Autoexec file applies them instantly. Knowing its purpose is the first step toward streamlining your gameplay and leveraging the full potential of console command configurations.
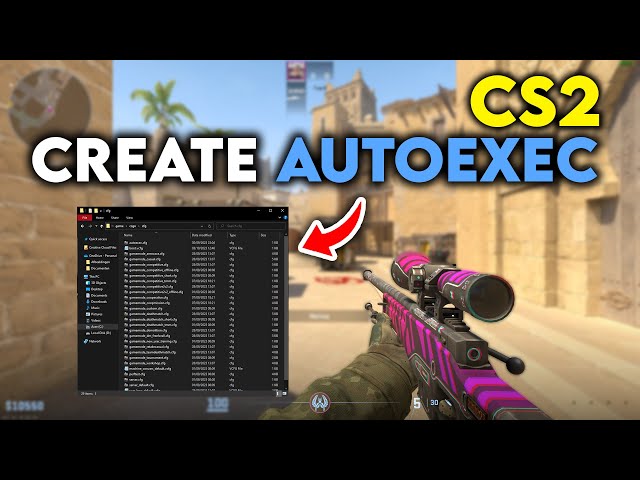
How to Create an Autoexec File in CS2
Creating a CS2 Autoexec file is a straightforward process, but it is essential to follow the steps carefully to ensure it functions correctly. This file allows you to customize your gameplay experience by automatically executing console commands when you launch the game.
Here’s how to create your own CS2 Autoexec file:
- Locate the CS2 Config Folder
Navigate to the directory where CS2 configuration files are stored. Typically, this is found in:Steam\steamapps\common\Counter-Strike 2\game\csgo\cfg - Create a New File
Open a text editor like Notepad. Save the file with the name . Ensure the file type is set to All Files to avoid accidentally saving it as a file.autoexec.cfg.txt - Add Commands
Write your desired console commands inside the file. For example:cl_radar_scale 1.15 bind "f" "use weapon_flashbang" - Verify the Execution
To ensure your CS2 Autoexec runs correctly, add this command at the end of the file:host_writeconfig
Finally, remember to test your autoexec file after launching CS2. Adjustments can be made later to optimize your settings.
Essential CS2 Console Commands for Gameplay
Integrating essential console commands into your CS2 Autoexec file can significantly enhance your gaming experience by automating settings and optimizing performance. Below are some indispensable commands every player should consider:
- Crosshair Customization:
Adjust your crosshair with commands like , , and . These help improve target visibility and precision.cl_crosshaircolorcl_crosshairsizecl_crosshairgap - Mouse Sensitivity:
Fine-tune your aim with . Experiment with values to find the perfect balance for your playstyle.sensitivity [value] - Audio Settings:
Use and to improve sound clarity and adjust in-game audio dynamically.snd_mixaheadvolume - Graphics Optimization:
Ensure optimal performance with commands like to unlock the frame rate or for multi-core rendering.fps_max 0mat_queue_mode 2 - Net Settings:
Enhance connectivity with commands such as , , and . These minimize lag and improve hit registration.cl_interpratecl_cmdrate
By adding these commands to your CS2 Autoexec, you create a seamless, personalized setup. Always test new commands before incorporating them permanently to avoid configuration issues.
Customizing Game Settings with Your Autoexec File
One of the main advantages of having a CS2 Autoexec file is the ability to personalize your game settings to suit your preferences and gameplay style. By including specific commands in your Autoexec file, you can streamline your CS2 experience and ensure consistent performance every time you launch the game.
Here are some ideas for customization:
- Graphics Settings: Adjust settings like texture quality or shadow details with commands such as and . These tweaks help optimize your game’s visuals for your hardware.
mat_queue_modemat_monitorgamma - Audio Preferences: Commands like and can configure sound levels to enhance in-game communication and immersion.
volumevoice_scale - Crosshair and HUD: Fine-tune your targeting options with commands like and .
cl_crosshairsizehud_scaling - Mouse Sensitivity: Settings like help you perfect aim and control.
sensitivity
Using a CS2 Autoexec, you can save all these preferences in a single file, eliminating the need to re-enter them manually. This level of customization enables a personalized and efficient gaming experience tailored to your needs.
Troubleshooting Common Autoexec Issues
Encountering issues with your CS2 Autoexec file can be frustrating, but most problems are easy to resolve with a bit of troubleshooting. Below are some common errors and their solutions:
- Syntax Errors: Typos in commands can prevent the file from executing correctly. Double-check your file for missing quotes, incorrect commands, or unnecessary spaces.
- File Location: Ensure the autoexec file is saved in the correct folder, typically within your CS2 installation directory under .
csgo\cfg - File Extension: Your autoexec file must be saved with a extension. If mistakenly saved as , it won’t function. Adjust this from your file name settings.
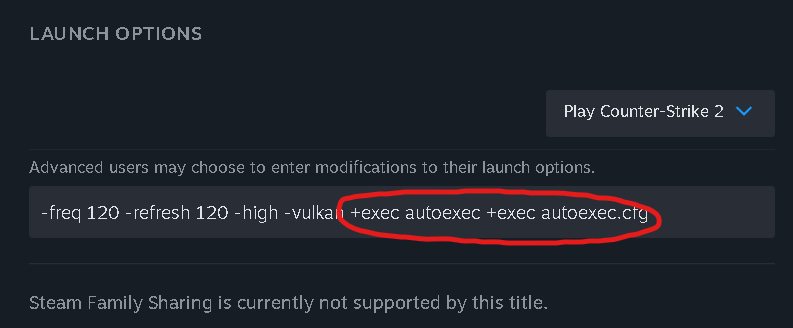
.cfg.txt - File Not Executing: Add the command to the game’s launch options. This ensures CS2 runs the file every time it starts.
+exec autoexec.cfg - Game Overwrites Settings: If CS2 resets your preferences, include the command at the end of your CS2 Autoexec file. This saves your settings permanently.
host_writeconfig
By addressing these issues, you can enjoy seamless gameplay with your customized settings intact!
Tips for Maintaining and Updating Your Autoexec File
Keeping your CS2 Autoexec file well-maintained and up to date is crucial for consistent performance in the game. As updates to CS2 roll out, some commands might become outdated. Here are a few tips to ensure your autoexec remains relevant:
- Backup Your Autoexec Regularly: Save a copy of your current autoexec file on an external drive or cloud storage. This can save time if you need to revert to an earlier version.
- Keep Commands Organized: Group similar commands together in the file, and use comments (prefixed with ) to label sections. This makes it easier to navigate and update.
// - Test Incrementally: After editing or adding new commands, test in small chunks to ensure there are no errors affecting gameplay.
- Stay Informed: Monitor CS2 updates and patch notes to learn about new commands or changes to existing ones.
By following these tips, your CS2 Autoexec will always be optimized for smooth and efficient gameplay. Always prioritize regular updates and testing to avoid any potential issues during critical moments.
Frequently Asked Questions
What is an autoexec file in CS2?
An autoexec file in Counter-Strike 2 (CS2) is a configuration file that players create to customize the game’s settings according to their preferences. It is a text file that contains console commands, which automatically execute every time you start the game. This allows players to save specific settings such as key bindings, graphics preferences, or gameplay tweaks without having to manually input them each time.
How do I create an autoexec file for CS2?
To create an autoexec file for CS2, start by opening any text editor, such as Notepad. Input the desired console commands into the file. Then, save the file with the exact name ‘autoexec.cfg’ and place it in CS2’s ‘cfg’ directory, usually located in the game’s installation folder. Ensure the file extension is ‘.cfg’ and not ‘.txt’, and add a command line to ensure the game reads the file on startup.
What are some basic commands to include in an autoexec file?
Basic commands often included in an autoexec file involve graphics optimization, key bindings, and game preferences. For example, commands such as ‘cl_radar_scale’ to adjust radar size, ‘bind’ to assign actions to specific keys, or ‘fps_max’ to set a limit on frames per second, are commonly used. These commands help tailor the gameplay experience to improve performance and comfort for individual players.
Why should I use an autoexec file in CS2?
Using an autoexec file in CS2 simplifies game configuration by automating the execution of preferred settings every time you launch the game. This is particularly useful for players who frequently tweak console commands to optimize their gaming experience. It also reduces the need to manually input commands and ensures that your custom settings are consistently applied, whether it’s for competitive play or general gameplay preferences.
For a second look at cash market prices, open CS2 market guides on CSOffer me. Skin.Trade stays the place to buy CS2 skins or sell CS2 skins.