Learn how to master surfing in CS2 with our beginner's guide, top map recommendations, and expert tips to improve your skills. Discover the best servers and join the surf community today!
· 6 min read
Are you ready to take your Counter-Strike 2 experience to the next level? Learning how to surf in CS2 not only provides a fresh challenge but also improves your movement skills within the game. Whether you’re a complete novice or looking to refine your surfing techniques, diving into this unique gameplay mechanic is an exhilarating journey. From mastering ramps to discovering vibrant surf communities, there’s so much to explore and enjoy. Let’s break down everything you need to know to start surfing like a pro in CS2.
Mastering the Ramps: A Beginner’s Guide to Surfing in CS2
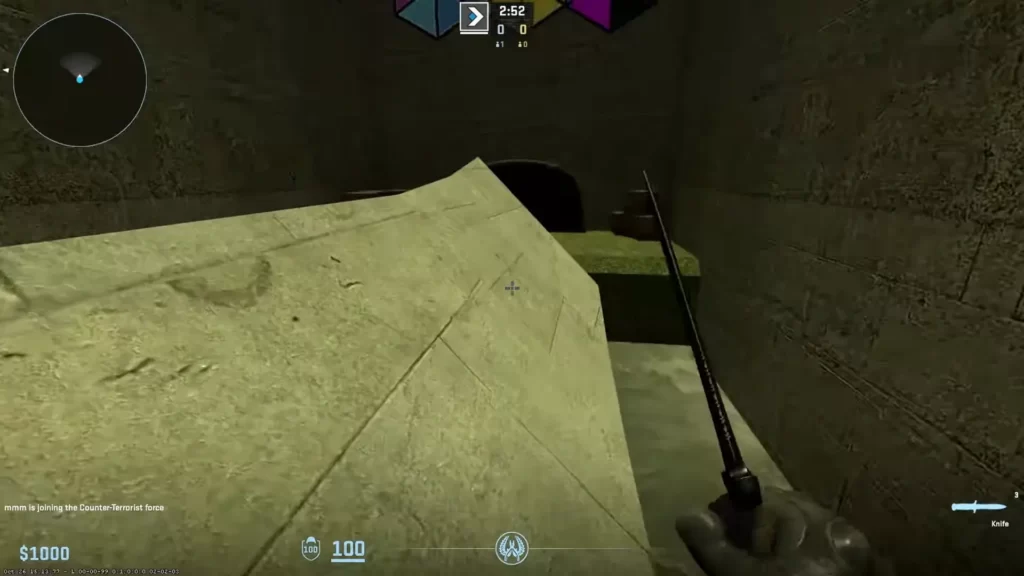
Surfing in CS2 can seem intimidating at first, but with the right approach, you’ll be gliding across ramps in no time. The goal is simple: use in-game mechanics to maintain momentum and navigate intricate surfaces smoothly. Here are the basics to get you started:
Understand the Controls: Mastering movement keys is essential. Use A to control left movement and D for right movement while steering with your mouse. Avoid pressing W unless adjusting in rare situations.
Balance Mouse Movements: Keep your mouse smoothly aligned to the ramp’s angle for better control. Abrupt mouse movements can disrupt your speed.
Maintain Momentum: Build and conserve speed by staying close to the ramp surfaces. The faster you go, the easier it is to tackle advanced sections.
Practice Bunny Hopping: While not directly part of surfing, this skill helps maintain rhythm in certain maps.
By sticking to these fundamentals and practicing regularly, you’ll soon unlock the thrill of mastering the art of surf in CS2! Don’t hesitate to take your time and enjoy the process of learning.
Finding Your Surf Community: Accessing Surf Servers in CS2
One of the first steps to mastering Surf in CS2 is finding the right community and accessing surf servers. These specialized servers provide the perfect environment to practice and improve your surfing skills. Here’s how you can get started:
Open the Server Browser: Launch CS2, navigate to the “Play” menu, and select “Community Servers” to access a variety of custom game modes, including surfing.
Search for Surf Servers: Use the keyword “surf” in the search bar within the server browser. This will show a list of available Surf servers, ranging from beginner-friendly to advanced options.
Check the Server Details: Before joining, consider factors like ping, current players, and map rotation. Low ping ensures smoother gameplay, while active communities often enhance the overall experience.
Favorites and History: Save the servers you enjoy by adding them to your favorites or checking them later in your history tab.
By immersing yourself in an active surf server, you’ll not only practice but also connect with others passionate about Surf in CS2, sharing tips and tricks along the way.
Your Surf Map Itinerary: Exploring the Best Maps for CS2 Surfing
When it comes to mastering how to surf in CS2, selecting the right maps is a crucial part of the journey. Some maps are beginner-friendly, while others present more complex designs for advanced players. Here’s a guide to some of the best surf maps worth your time:
Beginner-Friendly Maps:
surf_utopia – Ideal for newcomers with wide ramps and forgiving turns.
surf_rookie – Perfect for learning the basics, featuring simple jumps and clean layouts.
Intermediate Maps:
surf_mesa – Offers balanced challenges with narrow tracks and steeper slopes.
surf_aircontrol – Improves surfing precision as it emphasizes air movement.
Advanced Maps:
surf_buck-wild – Tests agility with intricate twists and jumps.
surf_overgrowth – Designed for pros seeking high-speed and technical skills.
Trying out various maps will help you refine your technique and keep the experience exciting. Experiment with different challenges and styles to elevate your ability to surf in CS2. Whether you’re a beginner or an expert, there’s a perfect map out there to suit your skills!
Enhancing Your Surf Experience: Tips to Elevate Your Skills
Improving your ability to surf in CS2 requires practice, focus, and adopting the right strategies. To help you elevate your skills, here are some essential tips to enhance your surfing experience:
Master the Basics: Before jumping into advanced moves, focus on mastering simple ramp navigation and consistent strafing techniques. Understanding the mechanics of moving left and right to gain momentum is key.
Adjust Your Settings: Customize your in-game sensitivity and field of view to optimize control. Many players find a lower sensitivity provides more precision.
Watch Skilled Surfers: Observe experienced players through streams or demos to learn movement patterns and tricks. Watching professionals surf in CS2 can inspire new techniques.
Experiment with Maps: Start with beginner-friendly maps, then gradually transition to more complex ones. Each map features unique layouts that challenge your adaptability.
Practice Regularly: Dedicate time to practice daily. Consistency is vital when it comes to refining your skills.
By following these tips, you’ll notice steady improvement in your ability to surf in CS2. Challenge yourself to implement new techniques and enjoy the process!
Enhancing Your Surf Experience: Tips to Elevate Your Skills
Improving your ability to surf in CS2 requires focus, practice, and the right approach. Whether you’re a beginner or experienced player, implementing smart strategies can make a significant difference.
Here are some actionable tips to help elevate your surfing experience:
Practice on Beginner-Friendly Maps Start on maps designed for newer players. These offer simpler ramps and more forgiving turns, helping you build foundational skills.
Master Strafing Techniques Strafing is the key to controlling movement. Use the “A” and “D” keys in tandem with your mouse to maintain speed and balance.
Adjust Your Sensitivity Settings Lower mouse sensitivity can provide smoother control. Experiment with settings until you find the sweet spot.
Focus on Momentum Maintaining speed is crucial for navigating ramps effectively. Avoid overcorrecting your movements, as it may slow you down.
Learn Advanced Mechanics Level up your skills by mastering techniques like bunny-hopping and edge boosts, which can improve your efficiency.
By implementing these tips, you’ll not only enhance your gameplay but also fully enjoy the thrill of surfing in CS2.
Frequently Asked Questions
What is surfing in CS2?
Surfing in CS2 is a community-created game mode where players navigate maps by sliding along ramps and curvatures while maintaining speed. It challenges your maneuverability and precision.
How do I start surfing in CS2?
To start surfing, you need to join a surf server or download surf maps from the Steam Workshop. Once you’re in, follow the ramps and use your movement keys to stay balanced and gain momentum.
What are the basic controls for surfing in CS2?
The basic controls involve holding down your strafe keys (A or D) and aligning your mouse with the ramp to maintain balance. Avoid pressing W, as it can disrupt your motion.
Are there different types of surf maps in CS2?
Yes, surf maps in CS2 vary in difficulty and objectives. Some maps focus on skill challenges, while others are linear and designed for timed runs. Players can choose maps that suit their skill level or playstyle.
How to Surf in CS2 is a CS2 note on Skin.Trade. Learn how to master surfing in CS2 with our beginner's guide, top map recommendations, and expert tips to improve your skills. Discover the best servers and join the surf community today! The sections below connect that advice to a real buy or sell, so the guide is not only a list of names.
CS2 pages on Skin.Trade are written for people who want a practical path from research to a completed Steam trade. A skin price is not a single number. It moves with exterior, float, StatTrak, pattern, stickers, and how many similar listings are live. Start by naming the exact finish, then compare that finish with nearby wears instead of trusting a headline price from an old screenshot.
Before you buy CS2 items, sign in with Steam, confirm Steam Guard Mobile, and save a working Trade URL. Skin.Trade delivers purchased skins with an official Steam trade offer. If the Trade URL is missing or the inventory is private, the offer cannot be completed. Set those account details first so checkout is not the moment you discover a block.
Selling works in the other direction. Select the items you actually want to cash out, review the quote, and send the trade only after the item names and quantities match. A quote is tied to the items in that offer. Swapping a Factory New piece for a Field-Tested one, or adding a stickered skin you did not mean to include, changes the value. Read the offer on Steam before you accept it.
Float and exterior explain most price gaps inside one finish. Factory New and Minimal Wear can be close on some weapons and far apart on others. Battle-Scarred is not automatically a bargain if the float is at the high end of the range or the pattern is unpopular. When a listing looks cheap, check the wear label, the float if it is shown, and whether StatTrak is present. Those three fields prevent the most common bad purchases.
Patterns and stickers are the next split. Doppler, Fade, Case Hardened, and similar finishes are priced by pattern, not only by name. A craft with tournament stickers can be worth more than the base gun, or the stickers can be scraped and worth little. Do not pay a craft premium unless you can see the stickers and you want them. For a play skin, a clean listing without a craft is usually easier to resell.
Liquidity matters as much as the sticker price. A common rifle skin with many listings is easier to buy and sell than a rare knife pattern with one listing. If you may want to cash out later, prefer finishes that show steady supply on Skin.Trade and on the broader market. A low asking price on an item nobody is buying is not a discount. It is a listing that can sit.
Crypto is the payout and deposit rail on Skin.Trade. Bitcoin, Ethereum, Litecoin, and USDT are the methods shoppers use, and each network has its own minimum and fee. Match the network to the wallet you control. An ERC20 USDT address is not a BEP20 address. Sending or requesting the wrong network is the usual reason a payment looks missing. The Limits and Fees page lists the current minimums so you can check them before you move funds.
Balance on the site is for buying. A completed sale can be withdrawn in crypto or left on the balance for the next purchase. Withdrawals follow the minimum for that method. If you are cashing out a small stack of cheap skins, grouping them into one sale is often cleaner than several payouts that each sit near the minimum. Fees are shown with the method, not added as a surprise after you confirm.
Security is part of the trade, not a separate product. Skin.Trade will not ask for your Steam password, Steam Guard code, private key, or seed phrase. Support is handled with Discord tickets. Impersonators copy avatars and ask for those secrets. Confirm the ticket is the official Skin.Trade server, and never move a trade off-platform because a message told you the site is down.
Use the guides as a checklist, then verify the live listing. Article prices and tier lists go stale. The marketplace row is the current ask. If this CS2 page helped you narrow a finish, open Buy to see what is actually for sale, or open Sell if you already hold the item and want a quote. That last check is what keeps a researched purchase from becoming an outdated one.
A useful CS2 shortlist has three columns: the finish you want, the wear you will actually play with, and the highest price you will pay today. Write those down before you open the market. Listings are easier to compare when the decision is already bounded. A Factory New knife and a Field-Tested rifle can both be “a good skin” and still be the wrong purchase if one of them blows the budget you set for the other.
Check supply before you treat a low ask as a win. Sort the same finish by price and see how many rows sit near that number. If several sellers are clustered together, the price is a market. If one row is far below the cluster, read the exterior and StatTrak flag again. The usual explanation is a higher float, a scraped sticker, or a different phase, not a generous seller. Paying the cluster price for the item you actually wanted is cheaper than “saving” money on a wear you will relist tomorrow.
When you sell CS2 items, split the inventory into keep and cash-out before you select anything. Play skins, gifts, and crafts you care about should not sit in the same selection as the duplicates you want gone. The Steam offer lists every item that will leave your inventory. Read that list on Steam, not only the quote on Skin.Trade. If a name is wrong, decline. Rebuilding the offer takes a minute. Reversing a completed trade does not.
Deposits and withdrawals are separate from the skin quote. Fund the balance with the crypto network your wallet already uses, then buy from that balance. After a sale, leave the funds on the site if you expect to buy again, or withdraw once the amount clears the minimum for Bitcoin, Ethereum, Litecoin, or the USDT network you selected. A payout under the minimum stays on the balance. That is the limit working, not a failed sale.
Keep a short record of the trade id, the Steam offer id, and the wallet address you used. Support can match those three pieces faster than a description of “the red knife from yesterday.” Discord tickets are the support channel. A direct message that asks you to cancel the official offer and send the skin to a different account is not part of CS2 checkout. The offer Skin.Trade created is the one you accept.
Guides on this site name finishes, commands, and loadouts. They do not lock a price. Cases, operations, and majors move demand, and a tier list from last season can still be a good explanation of why a skin is popular while being a bad quote for today. Use the article to decide what to look at. Use the live row on Buy, or the quote on Sell, to decide what to pay or accept.
If you are new to CS2 trading, do the first purchase with one inexpensive skin. Confirm the Trade URL, accept one Steam offer, and see the item land in the right inventory. That rehearsal is worth more than a large first cart. Once the path is familiar, larger orders are the same steps: balance, exact listing, Steam confirmation. The auction lobby and giveaways are different products. Do not fund them while you are trying to complete an ordinary purchase.
Return to the category you started from when you want another finish in the same game. CS2, Dota, TF2, and Rust archives are separate because the items, the economies, and the trade habits are not the same. A CS2 float note does not price a TF2 unusual, and a Dota set is not a CS2 loadout. Stay inside the archive that matches the inventory you are changing, then confirm the item name on the offer before you accept it.
Price a CS2 item in the order the market actually uses. Start with the weapon or hero, then the finish name, then the exterior. Only after those three match should you look at StatTrak, Souvenir, pattern, and stickers. Mixing that order is how two listings with the same thumbnail end up hundreds of dollars apart. A low float inside Factory New is a different product from the top of the Factory New range, and a phase or fade percentage can matter more than the wear label.
Stickers need their own look. A craft is valuable when the stickers are the ones buyers search for, they are unscraped, and their positions are intact. A random mix of cheap stickers does not inherit that premium. If the listing does not show the stickers clearly, do not pay a craft price for it. On a sale, point the stickers out in your own check so you are not quoting a plain gun when the inventory item is a craft, or the reverse.
Liquidity is the part tier lists skip. A finish can be famous and still be hard to sell if only one listing exists and nobody is taking it. Before you buy a CS2 piece you may want to cash out, look at how many similar rows are live and how close their prices sit. A tight cluster means you can leave later near the same number. A single outlier can sit for weeks. Fame is not the same thing as a buyer.
Set the account up once. Steam Guard Mobile has to be on, the inventory you trade from has to be public enough for the offer to generate, and the Trade URL saved on Skin.Trade has to belong to that same account. A URL copied from a friend, or an old URL from a second account, sends the skin to the wrong place. Update it before you pay, not after the offer fails. The same URL is what a sale uses when the site sends the offer you accept.
Move money on the network you can actually check. Bitcoin, Ethereum, Litecoin, and USDT each have a minimum and a fee on the Limits and Fees page. USDT additionally has a chain. Paste an address only after the chain on the withdrawal matches the chain in your wallet. If the amount is under the minimum, leave it on the site balance and use it for the next skin. Splitting a small cash-out across several networks usually costs more than waiting until the balance is large enough for one withdrawal.
Keep the first CS2 order small if you have not completed a Skin.Trade round trip before. One affordable skin proves the Trade URL, the Steam confirmation, and the inventory you expected. After that offer lands, a larger cart is the same sequence with more rows. Do not mix that rehearsal with a risk-auction entry or a giveaway ticket. Those spend balance too, and they do not deliver the specific listing you were researching.
When a guide and the live page disagree, trust the live page. Articles explain what a finish is and why players want it. They are written once. The buy row and the sell quote change with supply. If this CS2 note names a price, a drop, or a ranking, treat it as context and recheck it before you confirm. The Steam offer is the final list of items. If a name, exterior, or quantity on that offer is not what you selected, decline it and start again.
Support can reconstruct a trade from three facts: the Skin.Trade transaction or trade id, the Steam offer id, and, for a payout, the wallet address plus the network. Put those in a Discord ticket. Do not send a Steam password, a Steam Guard code, or a wallet seed, and do not accept a direct message that tells you the official offer is wrong and a different bot should receive the item. The offer created from your signed-in session is the trade.